Model Training with Ultralytics YOLO
Introduction#
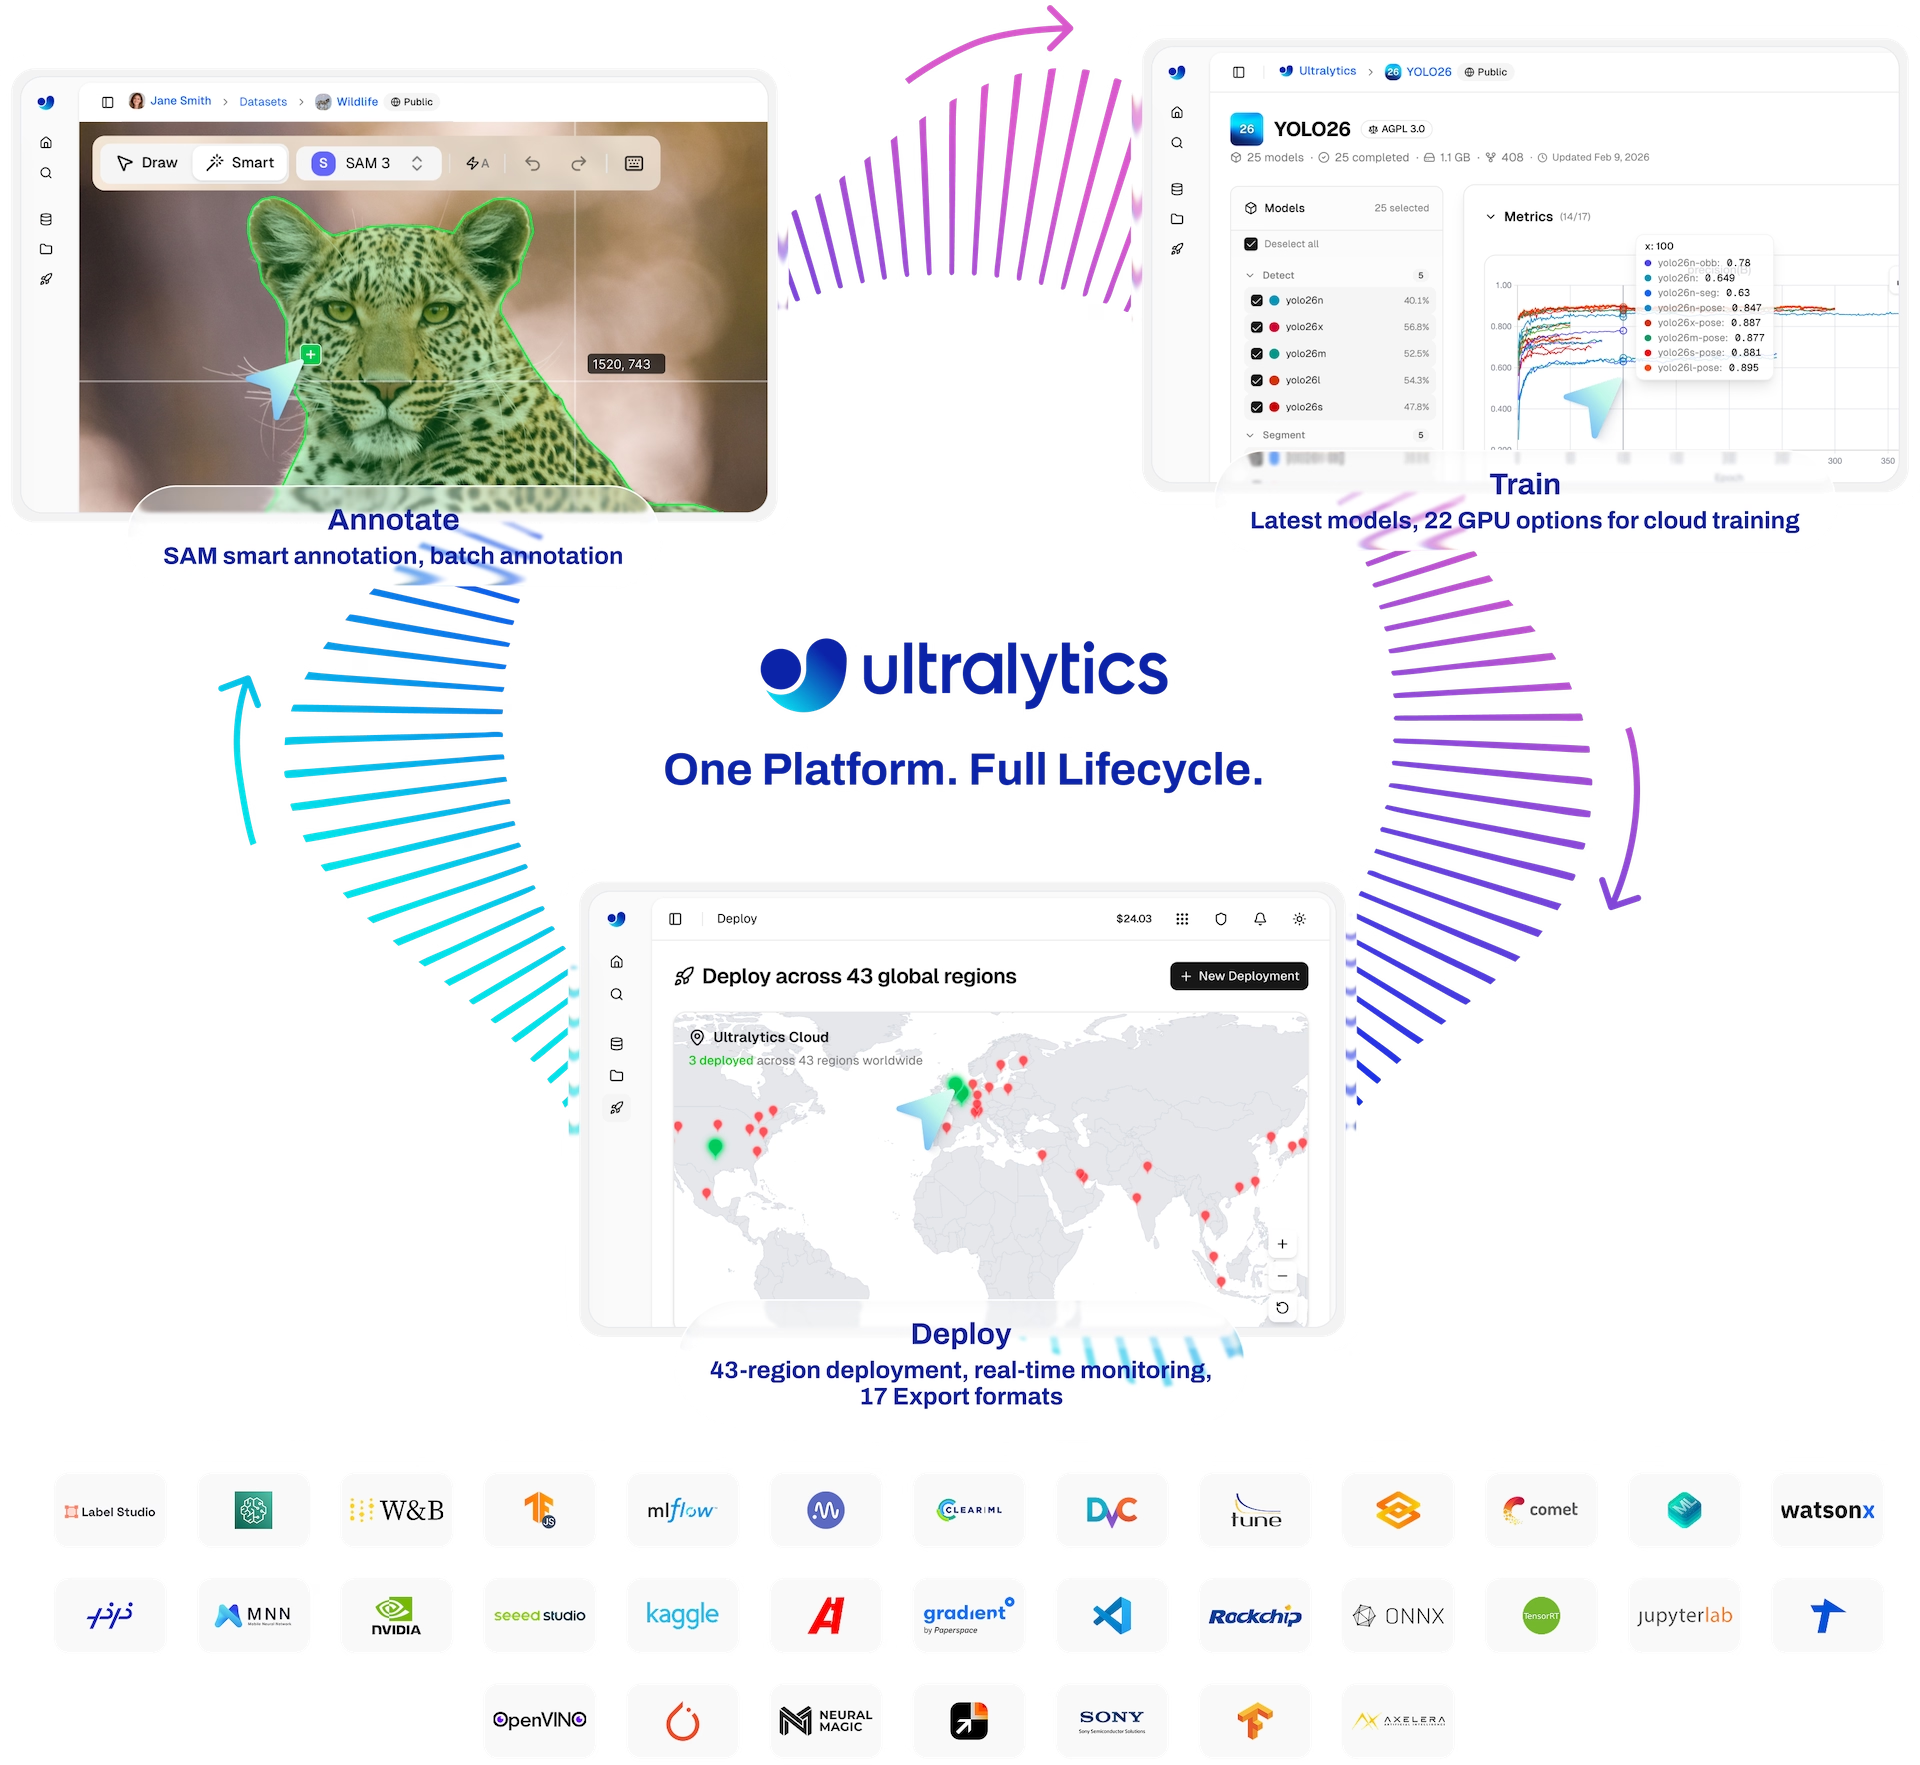
Training a deep learning model involves feeding it data and adjusting its parameters so that it can make accurate predictions. Train mode in Ultralytics YOLO26 trains object detection and other vision task models efficiently on modern hardware. This guide covers the details you need to start training your own models with YOLO26. If you haven't installed Ultralytics yet, start with the Quickstart guide.
See the unreleased YOLO27 preview for planned training examples.
Watch: How to Train a YOLO model on Your Custom Dataset in Google Colab.
Why Choose Ultralytics YOLO for Training?#
Reasons to use YOLO26's Train mode:
- Efficiency: Make the most of your hardware, whether you're on a single-GPU setup or scaling across multiple GPUs.
- Versatility: Train on custom datasets in addition to readily available ones like COCO, VOC, and ImageNet.
- User-Friendly: Simple yet powerful CLI and Python interfaces for a straightforward training experience.
- Hyperparameter Flexibility: A broad range of customizable hyperparameters to fine-tune model performance. For deeper control, you can customize the trainer itself.
- Cloud Training: Train on cloud GPUs through Ultralytics Platform with real-time metrics and automatic checkpointing.
Key Features of Train Mode#
The following are some notable features of YOLO26's Train mode:
- Automatic Dataset Download: Dataset configurations with a download source are downloaded automatically on first use, e.g.,
yolo train data=coco8.yaml. See the Datasets overview for supported formats and datasets. - Multi-GPU Support: Scale training across multiple GPUs to shorten training time.
- Hyperparameter Configuration: The option to modify hyperparameters through YAML configuration files or CLI arguments.
- Visualization and Monitoring: Real-time tracking of training metrics and visualization of the learning process for better insights.
Usage Examples#
Train YOLO26n on the COCO8 dataset for 100 epochs at image size 640. The training device can be specified using the device argument. If no argument is passed, GPU device=0 will be used when available; otherwise device='cpu' will be used.
On Windows, you may receive a RuntimeError when launching the training as a script. Add an if __name__ == "__main__": block before your training code to resolve it.
Device is determined automatically. If a GPU is available, it will be used (default CUDA device 0); otherwise training will start on CPU.
from ultralytics import YOLO

# Load a model
model = YOLO("yolo26n.yaml")  # build a new model from YAML
model = YOLO("yolo26n.pt")  # load a pretrained model (recommended for training)
model = YOLO("yolo26n.yaml").load("yolo26n.pt")  # build from YAML and transfer weights

# Train the model
results = model.train(data="coco8.yaml", epochs=100, imgsz=640)
Multi-GPU Training#
Multi-GPU training makes better use of available hardware by distributing the training load across multiple GPUs. This feature is available through both the Python API and the command-line interface. To enable multi-GPU training, specify the GPU device IDs you wish to use.
To train with 2 GPUs (CUDA devices 0 and 1), use the following commands. Expand to additional GPUs as required.
from ultralytics import YOLO

# Load a model
model = YOLO("yolo26n.pt")  # load a pretrained model (recommended for training)

# Train the model with 2 GPUs
results = model.train(data="coco8.yaml", epochs=100, imgsz=640, device=[0, 1])

# Train the model with the two most idle GPUs
results = model.train(data="coco8.yaml", epochs=100, imgsz=640, device=[-1, -1])Multi-GPU training does not work on Windows with the official PyTorch wheels for torch>=2.4. Ultralytics launches DDP through torch.distributed.run, whose rendezvous step builds a TCPStore that has defaulted to the libuv backend since PyTorch 2.4, and the official Windows wheels are built without libuv. Training exits immediately with:
RuntimeError: use_libuv was requested but PyTorch was built without libuv support
Setting USE_LIBUV=0 does not resolve this, because the rendezvous constructs the TCPStore directly and that code path never reads the variable. Train on Linux or WSL2 to use multiple GPUs, or train on a single GPU with device=0 on Windows.
When you specify multiple devices (e.g., device=[0, 1]), Ultralytics internally spawns a new trainer instance and executes torch.distributed.run under the hood. This works for standard CLI usage and unmodified Python scripts.
However, if your script contains custom components—such as a custom trainer, validator, dataset, or augmentation pipeline—these objects cannot be automatically serialized and transferred to the DDP subprocesses. In this case, you must launch your script directly with torch.distributed.run:
python -m torch.distributed.run --nproc_per_node 2 your_training_script.pyAMD GPU training uses a PyTorch ROCm build with the standard device=0 or device=cuda:0 syntax. See the AMD integration guide for ROCm installation, multi-GPU training, AMP notes, and MIGraphX inference of exported models.
Intel GPU training uses device=xpu:0, or multiple XPU IDs with a PyTorch build that provides XCCL.
Huawei Ascend NPU Training#
Ultralytics supports training and validation on Huawei Ascend NPUs through torch_npu. Install mutually compatible CANN, PyTorch, and torch_npu versions by following the Ascend Extension for PyTorch installation guide, then source the CANN environment before starting Ultralytics:
source /usr/local/Ascend/ascend-toolkit/set_env.shfrom ultralytics import YOLO
model = YOLO("yolo26n.pt")
# Train on one Ascend NPU
results = model.train(data="coco8.yaml", epochs=100, imgsz=640, device="npu:0")
# Train across two Ascend NPUs with HCCL
results = model.train(data="coco8.yaml", epochs=100, imgsz=640, device="npu:0,1")The standard training features, including AMP, validation, checkpointing, and resume, use the active NPU. AutoBatch is available for single-NPU training, while multiple NPU IDs launch distributed training through HCCL. See the Huawei Ascend integration guide for model export and deployment after training.
Idle GPU Training#
Idle GPU Training automatically selects the least utilized GPUs in multi-GPU systems, so you don't have to pick devices manually. It ranks available GPUs by utilization and free VRAM.
To automatically select and use the most idle GPU(s) for training, use the -1 device parameter. This is particularly useful in shared computing environments or servers with multiple users.
from ultralytics import YOLO

# Load a model
model = YOLO("yolo26n.pt")  # load a pretrained model (recommended for training)

# Train using the single most idle GPU
results = model.train(data="coco8.yaml", epochs=100, imgsz=640, device=-1)

# Train using the two most idle GPUs
results = model.train(data="coco8.yaml", epochs=100, imgsz=640, device=[-1, -1])
The auto-selection algorithm prioritizes GPUs with:
- Lower current utilization percentages
- Higher available memory (free VRAM)
This is especially useful in shared computing environments or when running multiple training jobs at once, because devices are chosen from current conditions each time a run starts.
Apple Silicon MPS Training#
Ultralytics YOLO models can train on Apple silicon through the Metal Performance Shaders (MPS) framework, which runs computation and image processing tasks on Apple's custom GPUs.
To train on Apple silicon, specify mps as your device when starting training, in Python or on the command line:
from ultralytics import YOLO

# Load a model
model = YOLO("yolo26n.pt")  # load a pretrained model (recommended for training)

# Train the model with MPS
results = model.train(data="coco8.yaml", epochs=100, imgsz=640, device="mps")
Resuming Interrupted Trainings#
Resuming training from a saved checkpoint is useful when a run was interrupted unexpectedly, or when you want to continue training a model with new data or for more epochs.
When training is resumed, Ultralytics YOLO loads the weights from the last saved model and also restores the optimizer state, learning rate scheduler, epoch number, and dataset. Training then continues from where it stopped. Pass an explicit data= alongside resume to continue on a different dataset instead of the checkpoint's.
Resume training in Ultralytics YOLO by setting the resume argument to True when calling the train method, and specifying the path to the .pt file containing the partially trained model weights.
To resume an interrupted training run in Python or on the command line:
from ultralytics import YOLO

# Load a model
model = YOLO("path/to/last.pt")  # load a partially trained model

# Resume training
results = model.train(resume=True)
By setting resume=True, the train function will continue training from where it left off, using the state stored in the path/to/last.pt file. If the resume argument is omitted or set to False, the train function will start a new training session. A run that streams to Ultralytics Platform continues the same Platform model when resumed.
Remember that checkpoints are saved at the end of every epoch by default, or at fixed intervals using the save_period argument, so you must complete at least 1 epoch to resume a training run.
Train Settings#
The training settings for YOLO models encompass various hyperparameters and configurations used during the training process. These settings influence the model's performance, speed, and accuracy. Key training settings include batch size, learning rate, momentum, and weight decay. Additionally, the choice of optimizer, loss function, and training dataset composition can impact the training process. Careful tuning and experimentation with these settings are key to optimizing performance.
MuSGD Optimizer#
In YOLO26, MuSGD is a hybrid optimizer that combines standard SGD updates with Muon-style orthogonalized updates.
It is recommended for longer YOLO26 training runs and larger datasets, where orthogonalized Muon updates can help stabilize optimization.
Only 2D linear weights and 4D convolutional filters (reshaped to 2D) receive the Muon-style update together with SGD, while all other parameters, such as batch normalization weights and bias terms, remain on standard SGD.
When optimizer=auto is used, Ultralytics automatically selects MuSGD for longer training runs (typically when iterations > 10000). For shorter runs, the trainer falls back to AdamW. In auto mode, the trainer also selects the learning rate, so a user-provided lr0 is ignored. To control these settings manually, select an optimizer explicitly, for example optimizer=AdamW lr0=0.001.
Example usage:
yolo train model=yolo26n.pt data=coco8.yaml optimizer=MuSGDSee the implementation in ultralytics/optim/muon.py and the optimizer auto-selection logic in BaseTrainer.build_optimizer.
| Argument | Type | Default | Description |
|---|---|---|---|
model | str | None | Specifies the model file for training. Accepts a path to either a .pt pretrained model or a .yaml configuration file. Essential for defining the model structure or initializing weights. |
data | str | None | Path to the dataset YAML (e.g., coco8.yaml), which carries the paths to training and validation data, class names, and number of classes. Classification instead takes a dataset directory or a built-in dataset name (e.g., imagenet10). |
epochs | int | 100 | Total number of training epochs. Each epoch represents a full pass over the entire dataset. Adjusting this value can affect training duration and model performance. |
time | float | None | Maximum training time in hours. If set, this overrides the epochs argument, allowing training to automatically stop after the specified duration. Useful for time-constrained training scenarios. |
patience | int | 100 | Number of epochs to wait without improvement in validation metrics before early stopping the training. Helps prevent overfitting by stopping training when performance plateaus. |
batch | int or float | 16 | Batch size, with three modes: set as an integer (e.g., batch=16), auto mode for 60% of available GPU memory (batch=-1), or auto mode with a specified fraction of available GPU memory (batch=0.70). |
imgsz | int | 640 | Target image size for training. Images are resized to squares with sides equal to the specified value (if rect=False), preserving aspect ratio for YOLO models but not RT-DETR. Affects model accuracy and computational complexity. |
save | bool | True | Enables saving of training checkpoints and final model weights. Useful for resuming training or model deployment. |
save_period | int | -1 | Frequency of saving model checkpoints, specified in epochs. A value of -1 disables this feature. Useful for saving interim models during long training sessions. |
cache | bool or str | False | Enables caching of dataset images in memory (True/ram), on disk (disk), or disables it (False). Improves training speed by reducing disk I/O at the cost of increased memory usage. |
device | int or str or list | None | Specifies the computational device(s) for training: a single GPU (device=0), multiple GPUs (device=[0,1]), CPU (device=cpu), MPS for Apple silicon (device=mps), Huawei Ascend NPU (device=npu:0 or device=npu:0,1), Intel XPU (device=xpu:0), or auto-selection of idle GPU (device=-1) or multiple idle GPUs (device=[-1,-1]). |
workers | int | 8 | Number of worker threads for data loading (per RANK if Multi-GPU training). Influences the speed of data preprocessing and feeding into the model, especially useful in multi-GPU setups. |
project | str | None | Name of the project directory where training outputs are saved. A relative path is placed under runs_dir/<task>, while an absolute path is used as-is. |
name | str | None | Name of the training run. Used for creating a subdirectory within the project folder, where training logs and outputs are stored. |
exist_ok | bool | False | If True, allows overwriting of an existing project/name directory. Useful for iterative experimentation without needing to manually clear previous outputs. |
save_dir | str | None | Specifies the exact directory where run outputs are saved, overriding the project/name combination. The path is used as-is without auto-incrementing, so consecutive runs reuse the same directory. |
pretrained | bool or str | True | Determines whether to start training from pretrained weights. Can be a boolean value or a string path to weights to load. pretrained=False trains from randomly initialized weights while keeping the model architecture. |
cls_remap | bool | True | When fine-tuning across datasets, copies pretrained classification head rows into the new model wherever the class names match, so overlapping classes keep their learned bias, plus their weights when the head width is unchanged. Applies whether the class counts differ or match with a different class order. |
optimizer | str | 'auto' | Choice of optimizer for training. Options include SGD, MuSGD, Adam, Adamax, AdamW, NAdam, RAdam, RMSProp, or auto to pick AdamW or MuSGD from the number of training iterations. Affects convergence speed and stability. |
seed | int | 0 | Sets the random seed for training, ensuring reproducibility of results across runs with the same configurations. |
deterministic | bool | True | Forces deterministic algorithm use, ensuring reproducibility but may affect performance and speed due to the restriction on non-deterministic algorithms. |
verbose | bool | True | Enables verbose output during training, displaying progress bars, per-epoch metrics, and additional training information in the console. |
single_cls | bool | False | Treats all classes in multi-class datasets as a single class during training. Useful for binary classification tasks or when focusing on object presence rather than classification. |
classes | list[int] | None | Specifies a list of class IDs to train on. Useful for filtering out and focusing only on certain classes during training. |
rect | bool | False | Enables minimum padding strategy—images in a batch are minimally padded to reach a common size, with the longest side equal to imgsz. Can improve efficiency and speed but may affect model accuracy. The standard YOLO trainer uses rect=True for detect, segment, pose and OBB validation, regardless of this setting. |
multi_scale | float | 0.0 | Randomly vary imgsz each batch by +/- multi_scale (e.g. 0.25 -> 0.75x to 1.25x), rounding to model stride multiples; 0.0 disables multi-scale training. |
cos_lr | bool | False | Utilizes a cosine learning rate scheduler, adjusting the learning rate following a cosine curve over epochs. Helps in managing learning rate for better convergence. |
close_mosaic | int | 10 | Disables mosaic data augmentation in the last N epochs to stabilize training before completion. Setting to 0 disables this feature. |
resume | bool | False | Resumes training from the last saved checkpoint. Automatically loads model weights, optimizer state, and epoch count, continuing training from where it stopped. |
amp | bool or str | True | Sets training precision: True or "fp16" uses FP16, "bf16" uses BF16 on supported CUDA devices, and False or "fp32" uses FP32. |
quantize | int or str | None | Set to 8 (or "int8") for INT8 quantization-aware training (QAT), which fine-tunes with fake-quantization in the loop so the weights tolerate INT8 export. See Quantization-Aware Training. |
fraction | float, int, or list | 1.0 | Dataset subset as a ratio/count or [train, val, test] list. 1 means the full split, integers above 1 are image counts, and only the optional test entry accepts 0/0.0 to mean none. Two-item lists keep test full. |
profile | bool | False | Enables profiling of ONNX and TensorRT speeds during training, useful for optimizing model deployment. |
freeze | int or list | None | Freezes the first N layers of the model, or specific layers by index or module name (23.cv2, without the leading model.), reducing the number of trainable parameters. Useful for fine-tuning or transfer learning. |
lr0 | float | 0.01 | Initial learning rate (e.g. SGD=1E-2, Adam=1E-3). Ignored under the default optimizer='auto'; name an optimizer explicitly to use it. |
lrf | float | 0.01 | Final learning rate as a fraction of the initial rate = (lr0 * lrf), used in conjunction with schedulers to adjust the learning rate over time. |
momentum | float | 0.937 | SGD/MuSGD momentum or beta1 for Adam optimizers. With optimizer=auto, AdamW uses 0.9; MuSGD starts at 0.9, then warmup interpolates from warmup_momentum to momentum. Without warmup, auto MuSGD stays at 0.9. |
weight_decay | float | 0.0005 | L2 regularization term, penalizing large weights to prevent overfitting. |
warmup_epochs | float | 3.0 | Warmup epochs (fractions allowed), capped to leave the final epoch without warmup. The learning rate rises linearly from 0 (bias from warmup_bias_lr) to its scheduled value, momentum from warmup_momentum to momentum, and gradient accumulation from 1 batch to its nominal value (see nbs), all reaching their targets as warmup ends. |
warmup_momentum | float | 0.8 | Starting momentum for optimizers with a momentum term (SGD, MuSGD, RMSprop), raised linearly to momentum by the end of warmup. Adam-family beta1 is not warmed up. |
warmup_bias_lr | float | 0.1 | Learning rate for bias parameters during the warmup phase, helping stabilize model training in the initial epochs. Automatically set to 0.0 under the default optimizer='auto', so name an optimizer explicitly to use it. |
distill_model | str | None | Path to a teacher model checkpoint (e.g. yolo26x.pt) for knowledge distillation. When set, the student model is trained with an extra distillation loss guided by the frozen teacher. |
dis | float | 6.0 | Weight of the distillation loss added to the standard detection losses. Higher values increase the influence of the teacher's feature guidance. |
box | float | 7.5 | Weight of the box loss component in the loss function, influencing how much emphasis is placed on accurately predicting bounding box coordinates. |
cls | float | 0.5 | Weight of the classification loss in the total loss function, affecting the importance of correct class prediction relative to other components. |
cls_pw | float | 0.0 | Power for class weighting to handle class imbalance using inverse class frequency. 0.0 disables class weighting, 1.0 applies full inverse frequency weighting. Values between 0 and 1 provide partial weighting. |
dfl | float | 1.5 | Weight of the box-distance regression term: distribution focal loss (DFL) when the detection head uses reg_max > 1, an L1 loss on normalized box distances on DFL-free YOLO26 (reg_max: 1). |
pose | float | 12.0 | Weight of the pose loss in models trained for pose estimation, influencing the emphasis on accurately predicting pose keypoints. |
kobj | float | 1.0 | Weight of the keypoint objectness loss in pose estimation models, balancing detection confidence with pose accuracy. |
rle | float | 1.0 | Weight of the residual log-likelihood estimation loss in pose estimation models, affecting the precision of keypoint localization. |
angle | float | 1.0 | Weight of the angle loss in obb models, affecting the precision of oriented bounding box angle predictions. |
dlog | float | 1.0 | Weight of the scale-invariant logarithmic (SILog) loss in depth estimation models, the primary term driving depth accuracy. |
dgrad | float | 0.5 | Weight of the gradient loss in depth estimation models, penalizing errors in depth edges and encouraging sharper surface boundaries. |
dlam | float | 1.0 | Variance-focus factor of the SILog loss in depth estimation models. 1.0 makes the loss fully scale-invariant, while 0.0 reduces it to plain log-RMSE. |
nbs | int | 64 | Nominal batch size. Gradients accumulate over round(nbs / batch) batches per optimizer step (at least 1 and, outside time mode, at most the run's total number of batches), and weight_decay is scaled by batch * accumulate / nbs to match. |
overlap_mask | bool | True | Determines whether object masks should be merged into a single mask for training, or kept separate for each object. In case of overlap, the smaller mask is overlaid on top of the larger mask during merge. |
mask_ratio | int | 4 | Downsample ratio for segmentation masks, affecting the resolution of masks used during training. Does not change the resolution of predicted masks. |
dropout | float | 0.0 | Dropout rate for regularization in classification tasks, preventing overfitting by randomly omitting units during training. |
val | bool | True | Enables validation during training, allowing for periodic evaluation of model performance on a separate dataset. |
split | str | 'val' | Dataset split used for validation during training: val, test, or train. Its metrics select best.pt and drive early stopping. |
nms | bool, optional | None | Selects the inference head used for epoch validation, checkpoint selection and early stopping. None or True uses one-to-many with NMS; False uses the NMS-free head when available. Both heads retain their training losses. |
plots | bool | True | Generates and saves plots of training and validation metrics, as well as prediction examples, providing visual insights into model performance and learning progression. |
compile | bool or str | False | Enables PyTorch 2.x torch.compile graph compilation with backend='inductor'. Accepts True → "default", False → disables, or a string mode such as "default", "reduce-overhead", "max-autotune-no-cudagraphs". Falls back to eager with a warning if unsupported. |
channels_last | bool | None | Uses the channels_last (NHWC) memory format for convolutions during training. None automatically enables it on CUDA with PyTorch 1.11 or newer, except on Windows, where it measured slower. False disables it, and True explicitly requests it. Training on CPU or MPS always stays NCHW (True is ignored with a warning). |
max_det | int | 300 | Maximum detections per image during training validation. For detect, segment, pose, and OBB, the default 300 increases to the largest train/val labeled-object count only when that count exceeds 300. Other values stay fixed; exceeding the limit triggers a warning. |
The batch argument accepts three kinds of values, and the trainer adds two safeguards:
- Fixed Batch Size: Set an integer value (e.g.,
batch=16), specifying the number of images per batch directly. Multi-GPU training splits this global batch evenly across GPUs, so it must be at least the GPU count; a remainder is dropped (e.g.,batch=15on 2 GPUs trains 7 images per GPU). - Auto Mode (60% GPU Memory): Use
batch=-1to automatically adjust batch size for approximately 60% of the CUDA memory available to training. - Auto Mode with Utilization Fraction: Set a fraction value (e.g.,
batch=0.70) to adjust batch size based on the specified fraction of available GPU memory. - OOM Auto-Retry: If a CUDA out-of-memory error occurs during the first epoch, the trainer automatically halves the batch size and retries (up to 3 times). This only applies to single-GPU training; multi-GPU (DDP) training will raise the error immediately.
- No Fit Found: If no candidate batch size produces a usable profile, AutoBatch raises a clear
RuntimeErrorinstead of silently falling back to an unrelated default.
Augmentation Settings and Hyperparameters#
Data augmentation techniques are essential for improving the robustness and performance of YOLO models by introducing variability into the training data, helping the model generalize better to unseen data. The following table outlines the purpose and effect of each augmentation argument:
| Argument | Type | Default | Supported Tasks | Range | Description |
|---|---|---|---|---|---|
hsv_h | float | 0.015 | detect, segment, semantic, depth, classify, pose, obb | 0.0 - 1.0 | Adjusts the hue of the image by a fraction of the color wheel, introducing color variability. Helps the model generalize across different lighting conditions. For classify, this applies only when auto_augment=None. |
hsv_s | float | 0.7 | detect, segment, semantic, depth, classify, pose, obb | 0.0 - 1.0 | Alters the saturation of the image by a fraction, affecting the intensity of colors. Useful for simulating different environmental conditions. For classify, this applies only when auto_augment=None. |
hsv_v | float | 0.4 | detect, segment, semantic, depth, classify, pose, obb | 0.0 - 1.0 | Modifies the value (brightness) of the image by a fraction, helping the model to perform well under various lighting conditions. For classify, this applies only when auto_augment=None. |
degrees | float | 0 | detect, segment, semantic, depth, pose, obb | 0.0 - 180 | Rotates the image randomly within the specified degree range, improving the model's ability to recognize objects at various orientations. |
translate | float | 0.1 | detect, segment, semantic, depth, pose, obb | 0.0 - 1.0 | Translates the image horizontally and vertically by a fraction of the image size, aiding in learning to detect partially visible objects. |
scale | float | tuple | 0.5 | detect, segment, semantic, depth, classify, pose, obb | 0 - 1, or an explicit (min, max) tuple (not for classify) | Scales the image by a gain factor, simulating objects at different distances from the camera. |
shear | float | 0 | detect, segment, semantic, depth, pose, obb | -180 - +180 | Shears the image by a specified degree, mimicking the effect of objects being viewed from different angles. |
perspective | float | 0 | detect, segment, semantic, depth, pose, obb | 0.0 - 0.001 | Applies a random perspective transformation to the image, enhancing the model's ability to understand objects in 3D space. |
flipud | float | 0 | detect, segment, semantic, depth, classify, pose, obb | 0.0 - 1.0 | Flips the image upside down with the specified probability, increasing the data variability without affecting the object's characteristics. |
fliplr | float | 0.5 | detect, segment, semantic, depth, classify, pose, obb | 0.0 - 1.0 | Flips the image left to right with the specified probability, useful for learning symmetrical objects and increasing dataset diversity. |
bgr | float | 0 | detect, segment, semantic, depth, pose, obb | 0.0 - 1.0 | Flips the image channels from RGB to BGR with the specified probability, useful for increasing robustness to incorrect channel ordering. |
mosaic | float | 1 | detect, segment, semantic, pose, obb | 0.0 - 1.0 | Combines four training images into one, simulating different scene compositions and object interactions. Effective for complex scene understanding. |
mixup | float | 0 | detect, segment, semantic, pose, obb | 0.0 - 1.0 | Blends two images and their labels, creating a composite image. Enhances the model's ability to generalize by introducing label noise and visual variability. |
cutmix | float | 0 | detect, segment, semantic, pose, obb | 0.0 - 1.0 | Combines portions of two images, creating a partial blend while maintaining distinct regions. Enhances model robustness by creating occlusion scenarios. |
copy_paste | float | 0 | segment, semantic, obb | 0.0 - 1.0 | Fraction of eligible objects pasted; flip mirrors them within the image, while mixup also uses the value as its cross-image application probability. |
copy_paste_mode | str | flip | segment, semantic, obb | - | Specifies the copy-paste strategy to use. Options include 'flip' and 'mixup'. |
auto_augment | str | randaugment | classify | - | Applies a predefined augmentation policy ('randaugment', 'autoaugment', or 'augmix') to enhance model performance through visual diversity. |
erasing | float | 0.4 | classify | 0.0 - 1.0 | Randomly erases regions of the image during training to encourage the model to focus on less obvious features. |
augmentations | list | None | detect, segment, semantic, depth, pose, obb | - | Custom Albumentations transforms for advanced data augmentation (Python API only). Accepts a list of transform objects for specialized augmentation needs. |
These settings can be adjusted to meet the specific requirements of the dataset and task at hand. Experimenting with different values can help find the best augmentation strategy.
For more information about training augmentation operations, see the reference section.
Logging#
Training metrics, plots, and checkpoints are always written to the run directory, and Ultralytics also streams them to any experiment tracker you have installed and enabled: Comet, ClearML, TensorBoard, MLflow, Weights & Biases, and DVCLive. Each logger is toggled through the Ultralytics settings, for example yolo settings tensorboard=True. The three most common setups are shown below.
Comet#
Comet is a platform that allows data scientists and developers to track, compare, explain and optimize experiments and models. It provides real-time metrics, code diffs, and hyperparameter tracking.
To use Comet:
# pip install comet_ml
import comet_ml

comet_ml.login()
Remember to sign in to your Comet account on their website and get your API key. You will need to add this to your environment variables or your script to log your experiments.
ClearML#
ClearML is an open-source platform that automates tracking of experiments and helps with efficient sharing of resources. It is designed to help teams manage, execute, and reproduce their ML work more efficiently.
To use ClearML:
# pip install clearml
import clearml

clearml.browser_login()
After running this script, you will need to sign in to your ClearML account on the browser and authenticate your session.
TensorBoard#
TensorBoard is a visualization toolkit for TensorFlow. It allows you to visualize your TensorFlow graph, plot quantitative metrics about the execution of your graph, and show additional data like images that pass through it.
To use TensorBoard in Google Colab:
%load_ext tensorboard
tensorboard --logdir ultralytics/runs # replace with 'runs' directory
To use TensorBoard locally, run the command below and view results at localhost:6006.
tensorboard --logdir ultralytics/runs # replace with 'runs' directoryThis will load TensorBoard and direct it to the directory where your training logs are saved.
After setting up your logger, start training as usual. Training metrics are logged automatically to your chosen platform, where you can monitor performance over time, compare models, and identify areas for improvement.
What's Next#
Validate your trained model against held-out data to check its real-world accuracy, then export it to ONNX, TensorRT, or another deployment format. Training on your own data instead of COCO8? Format it first with the Datasets guide.
FAQ#
Yes. Ultralytics Platform cloud training includes free credits to get started. Upload your dataset, select a model and GPU, and train directly from the browser.
To train an object detection model using Ultralytics YOLO26, you can either use the Python API or the CLI. Below is an example for both:
Single-GPU and CPU Training Examplefrom ultralytics import YOLO # Load a model model = YOLO("yolo26n.pt") # load a pretrained model (recommended for training) # Train the model results = model.train(data="coco8.yaml", epochs=100, imgsz=640)For more details, refer to the Train Settings section.
The key features of Ultralytics YOLO26's Train mode include:
- Automatic Dataset Download: Automatically downloads standard datasets like COCO, VOC, and ImageNet.
- Multi-GPU Support: Scale training across multiple GPUs for faster processing.
- Hyperparameter Configuration: Customize hyperparameters through YAML files or CLI arguments.
- Visualization and Monitoring: Real-time tracking of training metrics for better insights.
These features make training efficient and customizable to your needs. For more details, see the Key Features of Train Mode section.
To resume training from an interrupted session, set the
resumeargument toTrueand specify the path to the last saved checkpoint.Resume Training Examplefrom ultralytics import YOLO # Load the partially trained model model = YOLO("path/to/last.pt") # Resume training results = model.train(resume=True)Check the section on Resuming Interrupted Trainings for more information.
Class imbalance occurs when some classes have significantly fewer examples than others in your training data. This can cause the model to perform poorly on rare classes. Ultralytics YOLO supports class weighting through the
cls_pwargument to address this issue.The
cls_pwargument controls class weighting power based on inverse class frequency:cls_pw=0.0(default): Disables class weightingcls_pw=1.0: Applies full inverse frequency weighting- Values between
0.0and1.0: Provide partial weighting for moderate imbalance
The class weights are computed as
(1.0 / class_counts) ^ cls_pwand normalized so their mean equals 1.0. Classes without training labels, such as those excluded byclasses=, get a weight of 1.0.Training on Imbalanced Datasetfrom ultralytics import YOLO # Load a pretrained model model = YOLO("yolo26n.pt") # Train with full class weighting for severely imbalanced data results = model.train(data="custom.yaml", epochs=100, imgsz=640, cls_pw=1.0) # Or use partial weighting (0.25) for moderate imbalance results = model.train(data="custom.yaml", epochs=100, imgsz=640, cls_pw=0.25)TipStart with
cls_pw=0.25for moderately imbalanced datasets and increase to1.0if the rare classes still underperform. You can check the computed class weights in the training logs to verify the weight distribution.Yes, Ultralytics YOLO26 supports training on Apple silicon chips utilizing the Metal Performance Shaders (MPS) framework. Specify
mpsas your training device.MPS Training Examplefrom ultralytics import YOLO # Load a pretrained model model = YOLO("yolo26n.pt") # Train the model on Apple silicon chip (M1/M2/M3/M4) results = model.train(data="coco8.yaml", epochs=100, imgsz=640, device="mps")For more details, refer to the Apple Silicon MPS Training section.
Ultralytics YOLO26 allows you to configure a variety of training settings such as batch size, learning rate, epochs, and more through arguments. Here's a brief overview:
Argument Default Description modelNonePath to the model file for training. dataNonePath to the dataset YAML (e.g., coco8.yaml), or a dataset directory or name (e.g.,imagenet10) for classification.epochs100Total number of training epochs. batch16Batch size, adjustable as integer or auto mode. imgsz640Target image size for training. deviceNoneComputational device(s) for training like cpu,0,0,1, ormps.saveTrueEnables saving of training checkpoints and final model weights. For an in-depth guide on training settings, check the Train Settings section.


Comments1,074
Ask a question, share your results, or help someone else.
drcosimo
Hi there, I' m new to this field and I'm trying to train a YOLO model for detection and tracking of video streams for security.
Until now I have managed to create my pipeline for training and I want to understand if it's a correct/possible approach:
-
Load a pretrained model from yolo
-
transfer learning with my custom dataset that possibly can focus on just some classes(person,car,truck,bus,bycicle)
-
Validate model to see how it performs
-
Operate a tuning with the custom best model and using my custom dataset
-
Retrain the initial pretrained model with my custom dataset and the best hyperparameters found in the tuning process.
-
Validate final model
The questions are several:
- The above approach is logically correct or it has flaws?
- Is it correct to narrow the detected classes? Or it isn't crucial to the precision of the model?
- When tuning(if its a correct approach) should i use my dataset or try the coco dataset to keep generalization?
- When tuning should i specify the classes to detect?
- When retraining should I use the first pretrained model or it is better to use my custom trained model?
- In the final training am I using the correct parameters?
Here the code of the pipeline:
from ultralytics import YOLO import yaml
load pretrained model from coco dataset
model:YOLO = YOLO('yolov8n.yaml').load('yolov8n.pt')
train_classes = []
NOTE if you're using COCO format, the new dataset should also be in COCO format.
operate transfer learning with my custom dataset, narrowing the classes to the ones I want to detect
model.train(data='custom_data.yaml',classes=train_classes,epochs=200,imgsz=640,optimizer='AdamW',device=[0,1],augment=True,name='custom_model')
load custom model
custom_model = YOLO('path/to/best.pt')
validate custom model
custom_model.val()
try tuning to find the best hyperparameters for my custom model
custom_model.tune(data='custom_data.yaml', epochs=50, iterations=100,optimizer="AdamW", plots=True,save=True,val=True)
load best hyperparameters
cfg = yaml.load(open('path/to/best_hyperparameters.yaml'))
retrain custom model from pretrained on coco with best hyperparameters
model.train(data='custom_data.yaml',classes=train_classes,epochs=200,imgsz=640,device=[0,1],name='custom_model',exist_ok=True,optimizer='AdamW',**cfg)
load and validate
tuned_custom_model = YOLO('path/to/best.pt')
tuned_custom_model.val()
Thank you for your effort and time in this project!
3 Paula DerrengerUltralytics(edited)
Hello,
Your approach to training a YOLO model for detection and tracking is well-thought-out and mostly aligns with best practices. Here are some insights and answers to your questions:
-
Approach Validity: Your steps are logically sound. Starting with a pretrained model and applying transfer learning to your specific classes is a recommended strategy. Validating and tuning based on the performance helps refine the model further.
-
Narrowing Detected Classes: It's perfectly fine to focus on specific classes if those are the only ones relevant to your use case. This can help improve the model's performance by reducing the complexity of the problem it needs to solve.
-
Dataset for Tuning: Use your custom dataset for tuning. This ensures that the hyperparameters are optimized for the specific characteristics of your data rather than the general characteristics of the COCO dataset.
-
Specifying Classes During Tuning: When tuning, you should specify the classes if your dataset is a subset of the original classes used in the pretrained model. This helps in focusing the model’s learning and evaluation on relevant classes.
-
Model for Retraining: Tuning only finds hyperparameters, so the usual practice is to train again from the original pretrained model with the best hyperparameters, as in your step 5. Continuing from the already fine-tuned model is also possible, but then it effectively trains for longer, which makes the result harder to compare with the tuning runs.
-
Parameters for Final Training: The parameters should be chosen based on the results of your tuning. Ensure that they are the ones that gave the best validation performance during the tuning phase.
Keep up the great work, and don't hesitate to reach out if you have more questions!
-
Thank you very much for you response. I adjusted my script to follow your insights. I have another question regarding transfer learning. The normal approach in transfer learning is to freeze the first n layers to preserve the more generic feature extraction properties of an already trained model and then it is retrained letting only the remaining layers update. I found the callback function to achieve this. My question is, applying the fine-tuning as specified by ultralytics documentation has the same effect? What I mean is: executing the train method again on a pretrained model changing the dataset causes the underlying library to execute the freeze automatically? If it isn't the case it is not clear to me why the fine-tuning is said to have the same effect as applying transfer learning.
Another question is: it is useful to take a pretrained model from ultralytics and train it with the coco dataset? Because from what I know the pretrained model is already trained using coco dataset. Doing such a thing following the logic you provide for fine-tuning would be essentially the same as resuming a training / do the same train with more epochs?
Thank you again for your time.
- Paula DerrengerUltralytics
Hello,
Thank you for your follow-up questions. Let's address each of them:
-
Freezing Layers in Transfer Learning: The Ultralytics YOLO framework does not automatically freeze any layers when you initiate training, even if you're using a pretrained model. If you want to freeze the first N layers (common in transfer learning to preserve learned features), you must explicitly specify this in your training script. This is different from some other frameworks that might automate this aspect of transfer learning.
-
Training on COCO Dataset with a Pretrained Model: If the pretrained model you are using was already trained on the COCO dataset, retraining it on the same dataset without significant changes or additional data might not yield substantial improvements. It could be beneficial for fine-tuning if you've made modifications to the model architecture or if you're using a significantly altered version of the dataset. However, generally, this approach would indeed be akin to simply extending the training duration.
For fine-tuning and transfer learning, it's crucial to tailor the approach based on what changes you've made to the dataset or model and your specific goals (e.g., improving accuracy, adapting to new classes, etc.).
I hope this clarifies your queries! If you have more questions or need further assistance, feel free to ask.
-
-
wangztao
这个翻译太那啥了吧, train翻译成火车?
3- Paula DerrengerUltralytics
哈哈,确实,“train”翻译成“火车”听起来很有趣 😄。这里的“train”应该翻译为“训练”,指的是在机器学习中对模型进行训练,以提高其准确性和效率。感谢您指出这个问题,我们会尽快修正翻译错误。如果您有任何其他建议或问题,欢迎随时告诉我们!🚀
2
Syedshajib55
Hi, does platform.ultralytics currently support using custom PyTorch modules directly via a YAML configuration without modifying tasks.py or the core source code? We are attempting to train a custom architecture (e.g., YOLO26) and want to know if there is an existing feature for dynamic module registration.
1Muh-7
Hi, As far as I know, not at the moment. Ultralytics doesn't seem to have a built-in dynamic registration system where you can define a custom PyTorch module outside the repo and then use it directly in the YAML.
Usually, the custom module still needs to be imported/registered in
tasks.pyso thatparse_model()can resolve it from the YAML.It would be really useful if Ultralytics added something like a
register_module()API for this, though. Murat Raimbekov
@Syedshajib55 @Muh-7 Platform can train any model that the
ultralyticsPython package can build, including custom architectures from a modified package or fork. The custom code runs on your own hardware; Platform receives real-time metrics, console and system logs, plots, and the final weights.There is no dynamic registration API.
parse_model()resolves layer names from theultralytics.nn.tasksnamespace, so a name in your YAML must exist there. You don't need to edittasks.pyfor that — expose the class from your own package before building the model:import ultralytics.nn.tasks as tasks from my_custom_package import MyBlock tasks.MyBlock = MyBlock # now `[-1, 1, MyBlock, [...]]` resolves in the YAMLFull local training with metric streaming to Platform:
pip install "ultralytics>=8.4.120"
export ULTRALYTICS_API_KEY="YOUR_API_KEY"
import ultralytics.nn.tasks as tasks from my_custom_package import MyBlock from ultralytics import YOLO tasks.MyBlock = MyBlock model = YOLO("custom-model.yaml") # YAML referencing MyBlock model.train( data="ul://username/datasets/my-dataset", epochs=100, project="username/my-project", name="custom-architecture", )projectandnameenable the Platform integration automatically; nothing else is required. Verified on 8.4.157 with a customnn.Moduleinserted into a YOLO26n YAML: the model builds, trains, and appears on Platform as a completed run with weights and train args.One caveat: the saved
.ptpickles the class by import path (my_custom_package.MyBlock), so any environment that loads it needs that package importable — otherwise loading fails withModuleNotFoundError. That includes Platform-side features that load the uploaded weights with the stock package (Predict, Export, Deploy); local training and streaming are unaffected. Setup details: https://docs.ultralytics.com/platform/train/cloud-training/#remote-training
RussellLee12345
Hello all,
I want my training images to rotate 360 degrees randomly. How do I set the hyper-parameter: degrees?
Thanks a lot.
1 Glenn JocherUltralytics
@RussellLee12345 to rotate your training images randomly up to 360 degrees, set the
degreesparameter to180in your training configuration. This allows for rotations within the range of -180 to +180 degrees. For more details, see the augmentation settings in the Train Settings documentation.
GKYoffice
Please tell me how to set imgsz when I use the yolo11 model for training. Can it only be an integer (this means that the final input is a square)? After I modify this parameter, will the input interface of the network change the input of data? There are corresponding transformations, such as imgsz=1280, does it mean that my input data will be resized to 1280*1280 and input into the network for training?
Thanks!
1- Glenn JocherUltralytics
@GKYoffice when using the YOLO11 model,
imgszcan be set as an integer, which resizes the input data to a square of that size (e.g.,1280x1280). This parameter adjusts the input dimensions for training. For more details, please visit the training documentation.
IruhDegSet
hi, I'm just wondering if yolov8 accepts class weights, in the data.yaml file:
names: ['class 1', 'class 2', 'class 3']
classes_weights: [c1_weight, c2_weight, c3_weight]
if no how to incorpoorate wighted loss in yolov8 THX
1I forgot to mention that the task is segmentation not bb detection
1- Glenn JocherUltralytics
@IruhDegSet yOLOv8 does not directly support class weights in the
data.yamlfile. To incorporate weighted loss, you can modify the loss function in the training script to apply different weights to each class. For more details, you might explore custom loss implementations in PyTorch. @glenn-jocher thank you for your reply, does this apply on yolo v 11 too?
- Glenn JocherUltralytics(edited)
Yes, YOLO11 supports similar features, including training and hyperparameter customization. For specific details on YOLO11, please refer to the documentation or the relevant sections in the repository.
 User
Dear author, how are the weights of these three losses set: box: 7.5, cls: 0.5, dfl: 1.5? Are they adjusted on the COCO validation, manually adjusted, or obtained through hyperparameter search? For the model I trained, the output confidence scores are very low. I directly increased the weight of cls by 10 times, but the effect did not improve. What other methods can I take?
1- Glenn JocherUltralytics
@Stephen-Hao the weights for the
box,cls, anddfllosses in YOLOv8 are typically set based on empirical results and fine-tuning on standard datasets like COCO. These values are chosen to balance the contributions of each loss component to the overall training process. If increasing theclsweight did not improve your model's performance, consider the following approaches:- Hyperparameter Tuning: Experiment with other hyperparameters such as learning rate, batch size, and augmentation settings.
- Data Quality: Ensure your dataset is well-labeled and balanced. Poor quality data can significantly affect model performance.
- Training Duration: Increase the number of epochs to allow the model more time to learn.
- Validation: Regularly validate your model to monitor overfitting and adjust training strategies accordingly.
For more detailed guidance, you can refer to the Ultralytics YOLO training documentation.
- User
Thank you a lot!
- Glenn JocherUltralytics
@Stephen-Hao thank you for your question! The weights for
box,cls, anddfllosses are typically set based on empirical results and fine-tuning on standard datasets like COCO. If increasing theclsweight didn't improve your model's performance, consider experimenting with other hyperparameters such as learning rate, batch size, and augmentation settings. Additionally, ensure your dataset is well-labeled and balanced. For more detailed guidance, you can refer to the Ultralytics YOLO training documentation.
karthikUthaman
how to train a trained model again with new dataset
1- Glenn JocherUltralytics(edited)
Hey there! 🙌 It's awesome that you're looking to further improve your model with new data. To re-train a pre-trained model on a new dataset, you can simply follow these steps:
-
Make sure your new dataset is prepared in the same YOLO format as your initial training (a dataset YAML plus one
.txtlabel file per image). -
Load your pre-trained model using the
YOLOloading method, then specify your new dataset in thetrainmethod. Here's a quick code snippet for clarity:from ultralytics import YOLO # Load your pre-trained model model = YOLO('path/to/your/pretrained/model.pt') # Start training on the new dataset results = model.train(data='path/to/your/new/dataset.yaml', epochs=50, imgsz=640)
Just replace
'path/to/your/pretrained/model.pt'and'path/to/your/new/dataset.yaml'with the actual paths to your model and new dataset config file, respectively. Adjust theepochsandimgsz(image size) to suit your needs. 🛠️That's it! Your model will now continue training on the new dataset. If you have any further questions or run into issues, feel free to ask. Happy training! 🚀
-
songziang182
谢谢你们开发了这么完善的 yolov8🙏, 我想问一下,这两种训练方式的区别 model = YOLO('yolov8n.pt') model = YOLO('yolov8n.yaml').load('yolov8n.pt') model.train(.........)
1- Paula DerrengerUltralytics
Hello there! 😊
The main difference between the two training methods you've mentioned:
-
model = YOLO('yolov8n.pt'): This directly loads a pretrained YOLOv8n model. It's the simplest way to load a model that has already been trained, making it ready for further training, evaluation, or inference right away. -
model = YOLO('yolov8n.yaml').load('yolov8n.pt'): This approach builds a new model from the YAML configuration file and then transfers the weights from the pretrained.ptmodel. It's a two-step process, where the model is first constructed based on the architecture defined in the YAML file, and then the weights from a pretrained model are loaded. This method is useful when you want to customize the model architecture before loading the weights.
Both methods ultimately get you to a similar starting point for continuing training or making predictions. The choice depends on whether you need to customize the model architecture as defined in the YAML file before applying the pretrained weights.
Let me know if this helps or if you have more questions!
-
Thank you for answering me. I find it very useful. I have another question, which is the configuration file yolov8n.yaml. I didn’t find where it is. Can I adjust the scale of the model, for example, n, s, m, l, etc., is this the case?
- Paula DerrengerUltralytics(edited)
Hey! 😊 Thank you for your kind words, and I'm glad the information was helpful to you!
Regarding the
yolov8n.yamlconfiguration file, it defines the architecture for YOLOv8 models. All scales share one model file (yolov8.yaml) that contains ascalessection mapping each letter to[depth, width, max_channels]; the letter in the name you load (yolov8n.yaml,yolov8s.yaml, ...) selects the scale:scales: n: [0.33, 0.25, 1024] s: [0.33, 0.50, 1024]To create or modify a model, copy the YAML from the Ultralytics GitHub repository, edit the layers or scales, then load it together with the pretrained weights as you mentioned:
model = YOLO('path/to/custom_yolov8.yaml').load('yolov8n.pt')
model.train(.........)
Model changes can require a solid understanding of the network architecture to be effective.
I hope this clarifies your question! Feel free to reach out if you have further queries or need more examples. 😊
vonzo
So, imgsz works different when training than when predicting?
For train: if it's an
intthe ratio will be kept and the train function will take care of that (can't be atuple). For predict: if it's anintthe image will be resized as a square of sizeimgsz x imgsz, if it's atuplethe image will be resized usingHxWand the user has to take care of the ratio andstride.Is this right? I would add a comment in the doc to avoid confusions
1- Paula DerrengerUltralytics(edited)
You've got it mostly right! 👍 For training (
train),imgszis anint, the aspect ratio is maintained and resizing is handled internally. It can't be atuple. For prediction (predict), anintimgszresizes the longest side toimgszwhile keeping the aspect ratio, with padding only up to a multiple of the model stride (so the image is not forced into a square), and a[h, w]list sets the size explicitly.Great suggestion on the documentation comment – clarity is key! If you have any more questions or need further examples, feel free to ask. 😊